Fun With Photovoltaic's
Posted: Fri Oct 31, 2014 7:45 pm
Fun With Photovoltaic's
(Not you typical tech article about tires, gear ratios, suspension mods, etc )
)
A little background on this project....
Previously I set up my trailer with a living space up front with a few amenities for multi day Jeeping adventures.
One of the amenities was a set of three 100 ah group 27 deep cycle batteries to feed a 1,600 watt power inverter for powering the 110 volt refrigerator and some interior lights.
The current battery & inverter setup in the trailer..
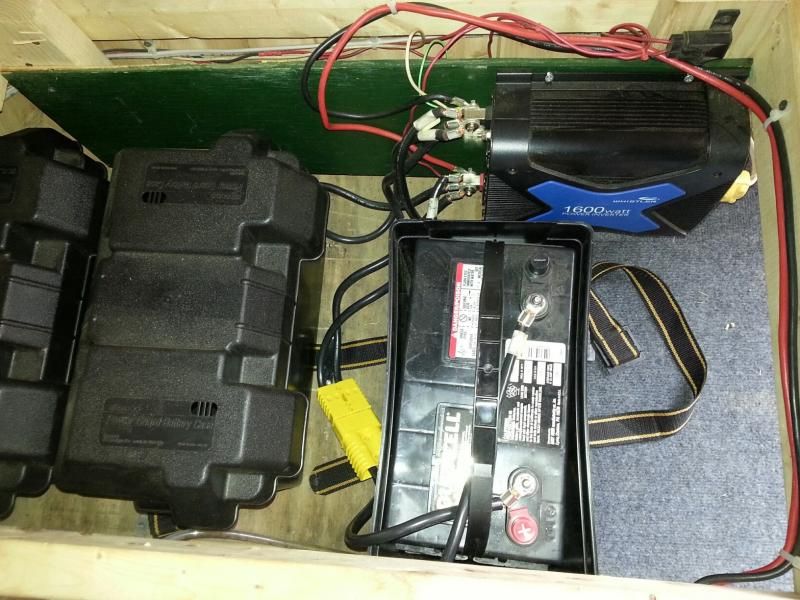
Generally the 3 batteries would last for a 3-4 day outing but on longer trips such a Rausch Creek the batteries would get depleted and require charging to make it thru the entire trip. Once I brought a small portable generator to charge the batteries and it worked OK but I detest the noise a generator makes. It just ruins the tranquility of a camping experience. I certainly don't want to be "that guy" in the future disturbing fellow campers like the clown next to us did this past fall at Rausch!
Sure adding more heavy batteries would make it run longer but what fun would that be?
With the suggestion of a buddy at work and again by Ryan I looked into adding some solar panels to the roof of the trailer to generate power to recharge the batteries. This would eliminate the need to recharge the batteries on longer trips and would allow me to possibly power other items. I did a bit of reading and found that adding solar panels to RV's is fairly common. So being the electrical engineer that I am I eagerly dove into the project.
As my first venture into photovoltaic's I decided to pick up a "kit" to get started. The Renogy kit I selected consisted of a single 100 watt solar panel ~2'x4', a solar charge controller, mounting hardware and some cables.
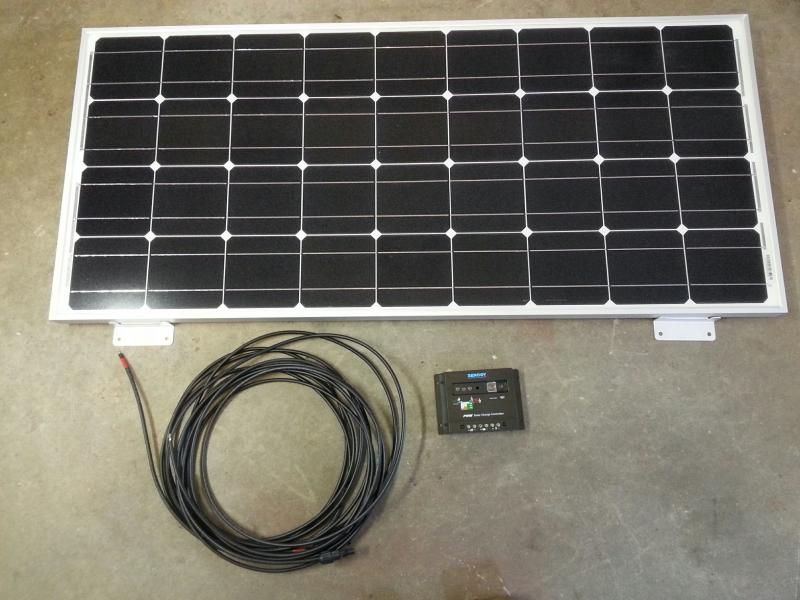
The first step was to temporarily set up the kit and wire it into the battery/inverter system and see how the single 100 watt panel did with the refrigerator running.
To my amazement the lone panel in the October sunlight was able to generate enough power to run the refrigerator and maintain the battery voltage. For this test the panel was pointed directly at the sun. In it's planned mounting it would be on the roof of the trailer horizontally and not directly pointed at the sun thus yielding reduced power.
Since the initial test was a success I ordered two additional panels to bring the total capacity to 300 watts. The added panels will provide some additional power to enable the use of other electrical appliances such as a coffee pot without drawing the batteries down too far.
Battery life is very dependent on how far they are drawn down before they are recharged again. Drawing them down deeply or to near zero capacity and then charging them back up greatly shortens their life span. It's best to only draw them down slightly before re-charging them. Hopefully the 300 watts will prevent the batteries from being drawn very far before they are again recharged by the system.
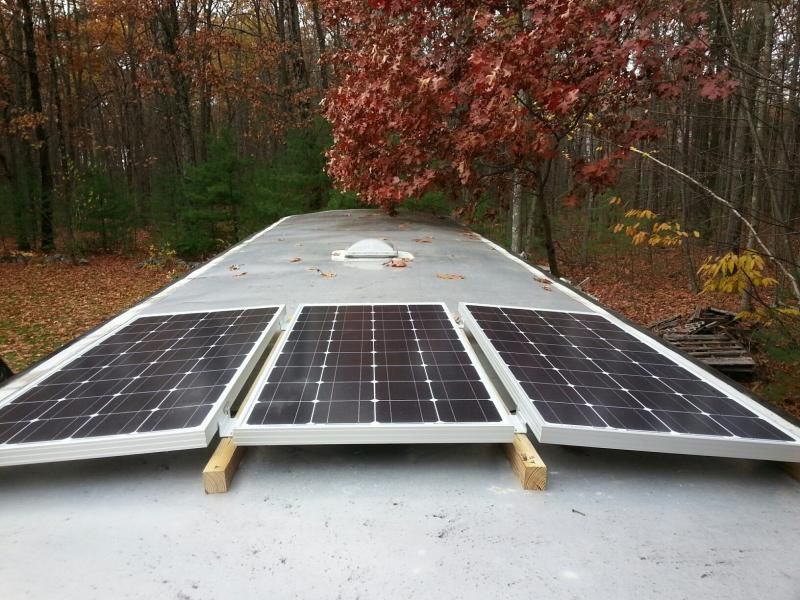
The roof structure of the trailer would not permit mounting the panels directly to the roof as their mounting tabs would not align with the steel arch's that support the thin aluminum skin of the roof. To get around this I will be using some 4' long pressure treated 2x2's screwed to the steel roof bows that support the roofing material. The solar panels will then be fastened to the 2x2's.
The additional solar panels arrived today and the roof top installation can now begin.
2x2's mounted to the center panel..
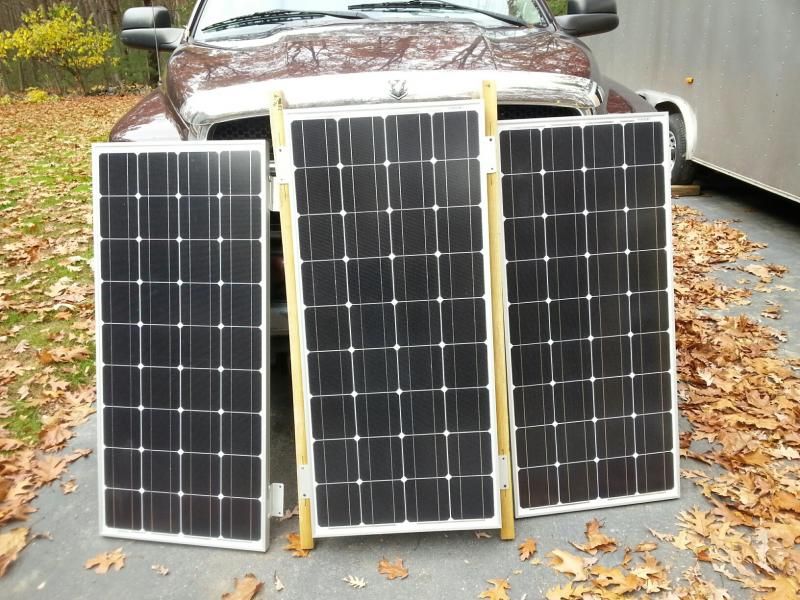
First step was to carefully lay out where to drill the 12 holes thru the roof from the inside. (Measure twice drill once)
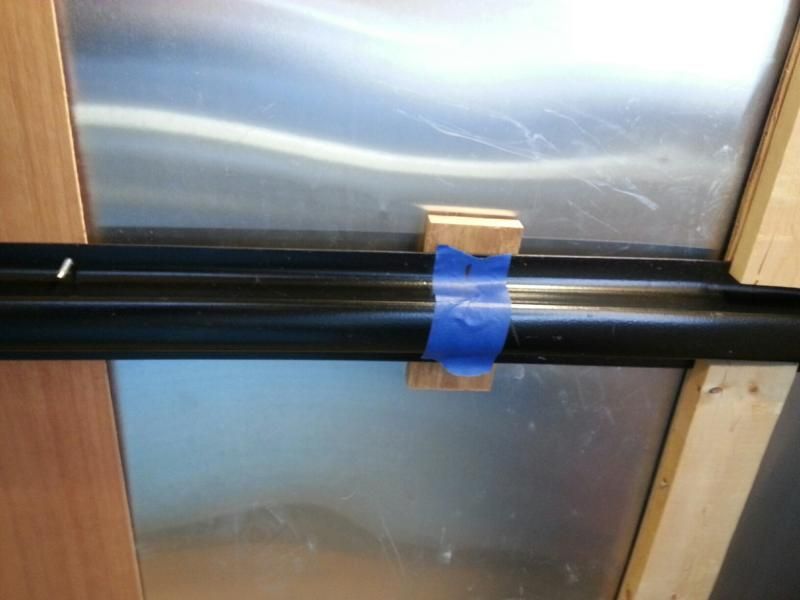
Once the holes were drilled the center panel's support rails were screwed to the roof from the inside using some stainless steel screws and sealed with some RTV silicone sealant to prevent leaks.
After the first panel/rail assembly was installed the two additional panels were attached on either side of the first panel (they share mounting rails) and their rails where secured to the roof.
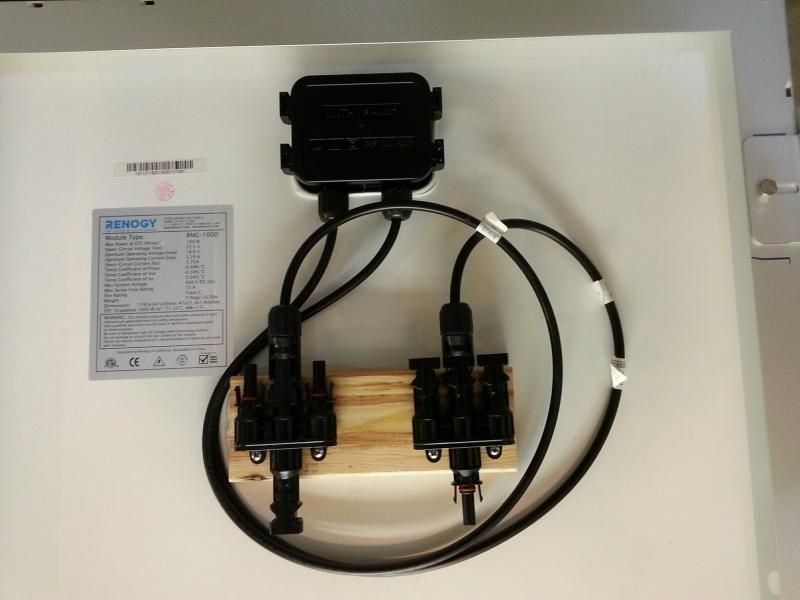
The panels come with standard "MC4" connectors and short leads. The leads from the three panels where then connected in parallel via a paralleling connector and then wired thru the roof and down to the wall mounted charge controller.
The back of the center panel with the paralleling connectors screwed to a block of wood.
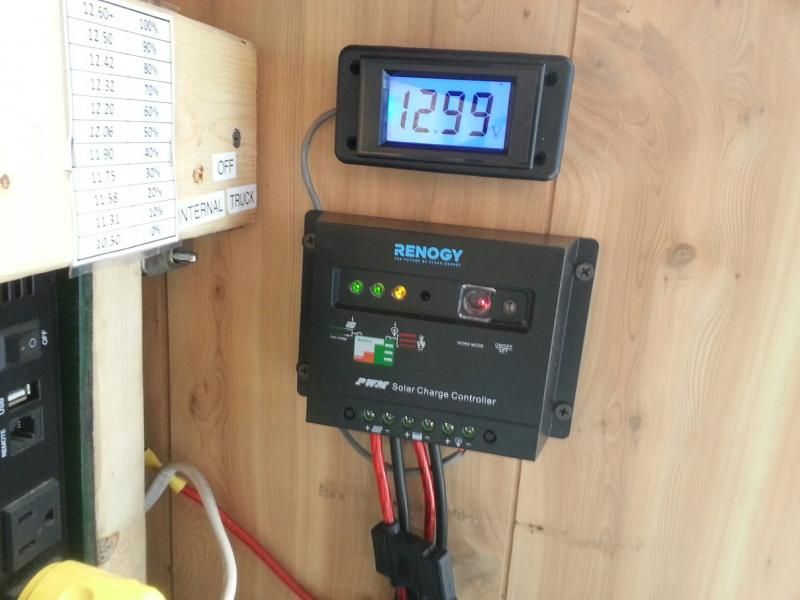
After that the needed wiring was run from the charge controller to the batteries. Additionally I installed a LCD voltmeter so that the battery voltage can be monitored. (The charge controller has an "idiot" light to indicate battery charge level but a real voltmeter is infinitely better to determine the state of charge.)
Wiring from the panels was then completed to the panels via a fuse. A fuse was also installed between the charge controller and the batteries for protection should something ever go wrong!
Looking forward to see how the setup works next year.
(Not you typical tech article about tires, gear ratios, suspension mods, etc
A little background on this project....
Previously I set up my trailer with a living space up front with a few amenities for multi day Jeeping adventures.
One of the amenities was a set of three 100 ah group 27 deep cycle batteries to feed a 1,600 watt power inverter for powering the 110 volt refrigerator and some interior lights.
The current battery & inverter setup in the trailer..

Generally the 3 batteries would last for a 3-4 day outing but on longer trips such a Rausch Creek the batteries would get depleted and require charging to make it thru the entire trip. Once I brought a small portable generator to charge the batteries and it worked OK but I detest the noise a generator makes. It just ruins the tranquility of a camping experience. I certainly don't want to be "that guy" in the future disturbing fellow campers like the clown next to us did this past fall at Rausch!
Sure adding more heavy batteries would make it run longer but what fun would that be?
With the suggestion of a buddy at work and again by Ryan I looked into adding some solar panels to the roof of the trailer to generate power to recharge the batteries. This would eliminate the need to recharge the batteries on longer trips and would allow me to possibly power other items. I did a bit of reading and found that adding solar panels to RV's is fairly common. So being the electrical engineer that I am I eagerly dove into the project.
As my first venture into photovoltaic's I decided to pick up a "kit" to get started. The Renogy kit I selected consisted of a single 100 watt solar panel ~2'x4', a solar charge controller, mounting hardware and some cables.

The first step was to temporarily set up the kit and wire it into the battery/inverter system and see how the single 100 watt panel did with the refrigerator running.
To my amazement the lone panel in the October sunlight was able to generate enough power to run the refrigerator and maintain the battery voltage. For this test the panel was pointed directly at the sun. In it's planned mounting it would be on the roof of the trailer horizontally and not directly pointed at the sun thus yielding reduced power.
Since the initial test was a success I ordered two additional panels to bring the total capacity to 300 watts. The added panels will provide some additional power to enable the use of other electrical appliances such as a coffee pot without drawing the batteries down too far.
Battery life is very dependent on how far they are drawn down before they are recharged again. Drawing them down deeply or to near zero capacity and then charging them back up greatly shortens their life span. It's best to only draw them down slightly before re-charging them. Hopefully the 300 watts will prevent the batteries from being drawn very far before they are again recharged by the system.
The roof structure of the trailer would not permit mounting the panels directly to the roof as their mounting tabs would not align with the steel arch's that support the thin aluminum skin of the roof. To get around this I will be using some 4' long pressure treated 2x2's screwed to the steel roof bows that support the roofing material. The solar panels will then be fastened to the 2x2's.
The additional solar panels arrived today and the roof top installation can now begin.
2x2's mounted to the center panel..

First step was to carefully lay out where to drill the 12 holes thru the roof from the inside. (Measure twice drill once)

Once the holes were drilled the center panel's support rails were screwed to the roof from the inside using some stainless steel screws and sealed with some RTV silicone sealant to prevent leaks.
After the first panel/rail assembly was installed the two additional panels were attached on either side of the first panel (they share mounting rails) and their rails where secured to the roof.

The panels come with standard "MC4" connectors and short leads. The leads from the three panels where then connected in parallel via a paralleling connector and then wired thru the roof and down to the wall mounted charge controller.
The back of the center panel with the paralleling connectors screwed to a block of wood.

After that the needed wiring was run from the charge controller to the batteries. Additionally I installed a LCD voltmeter so that the battery voltage can be monitored. (The charge controller has an "idiot" light to indicate battery charge level but a real voltmeter is infinitely better to determine the state of charge.)
Wiring from the panels was then completed to the panels via a fuse. A fuse was also installed between the charge controller and the batteries for protection should something ever go wrong!

Looking forward to see how the setup works next year.
