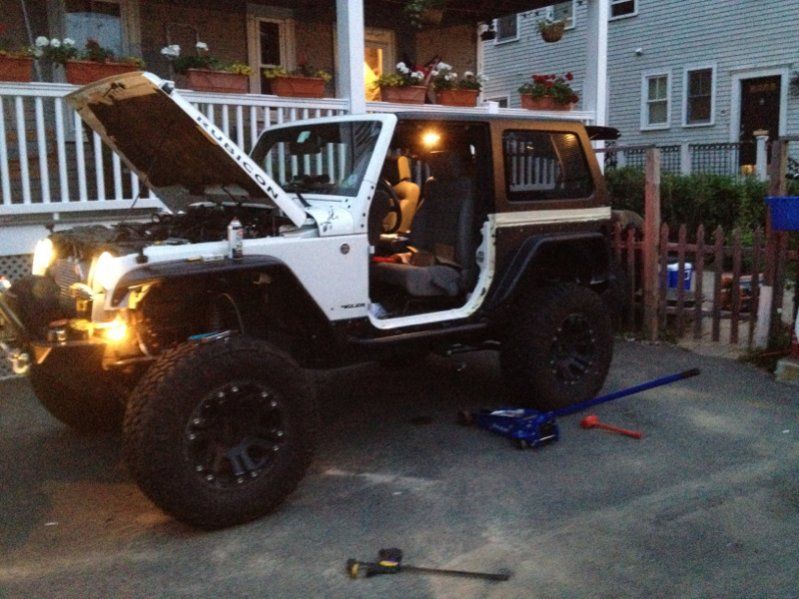
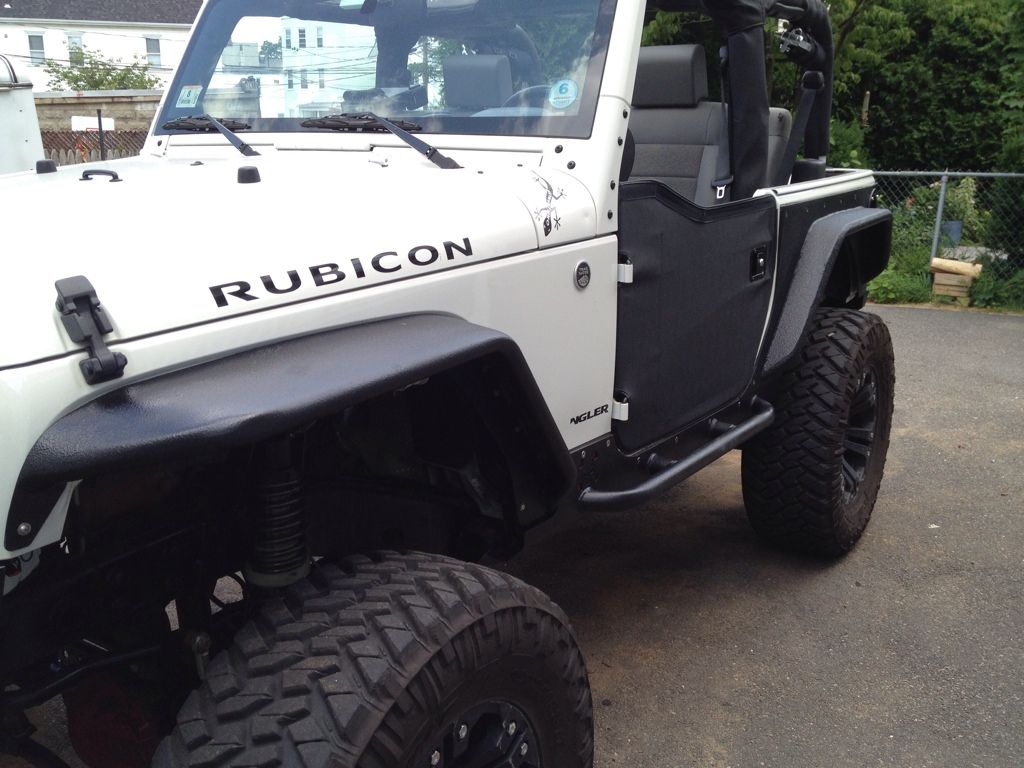
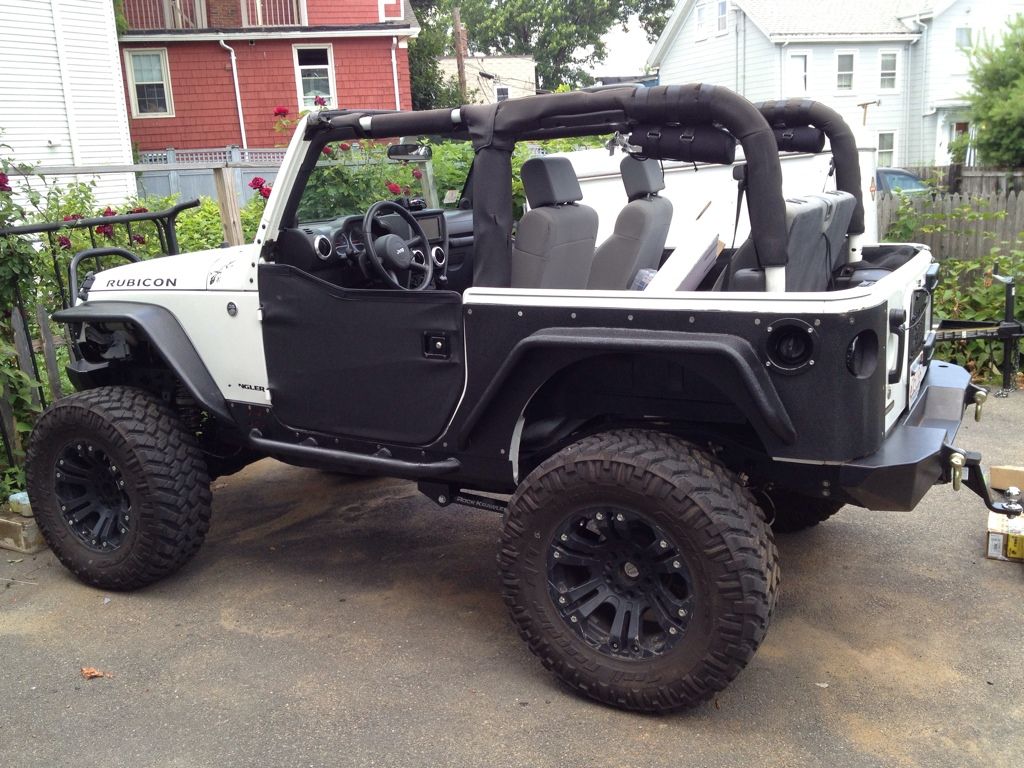
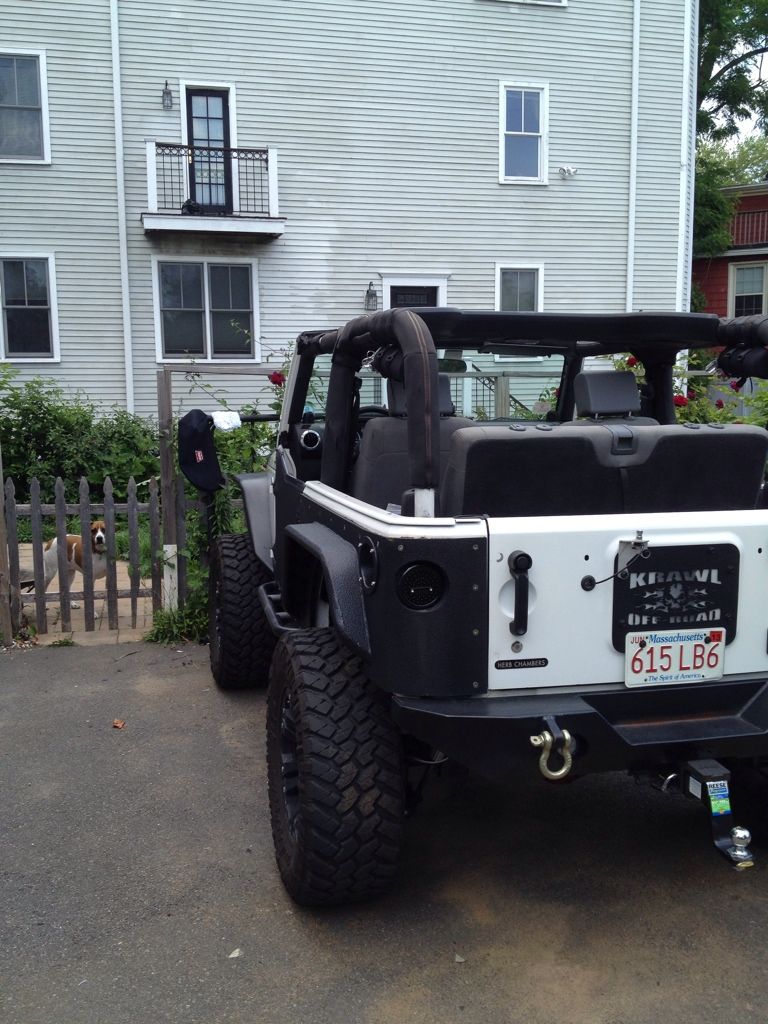
I've been done with this for a few weeks now but I figured I'd do a quick write up of the install. The object here obviously was to protect the body as much as possible from damage before it happens. I gotta say its a major pain to take on any job that's more than a day's work without having a garage. First welding job for me also, so take it easy on me
First step was to rip off the JK tupper-flares and inner fender liners. Pretty easy process, just grab and snatch (if you're not worried about snapping the "T" clips that hold them on.) Then remove the stock rubi rock rails.
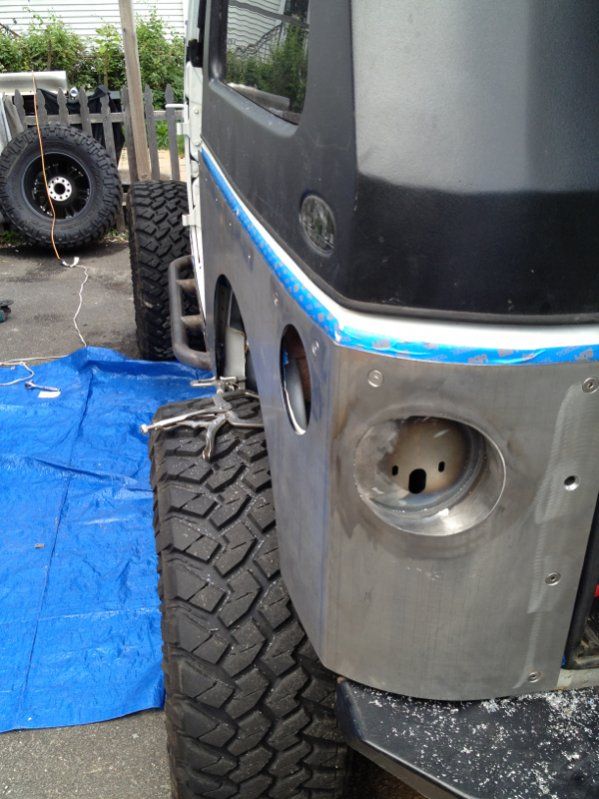
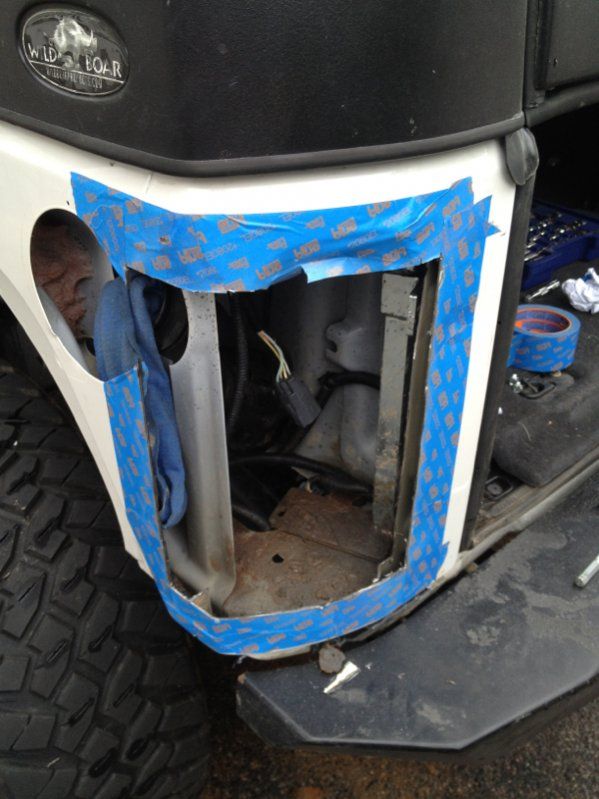
Next I had a nice big hole to cut where the old tail lights used to sit. Has to be done for the corners to properly fit to the body with minimal gap due to the JK's compound body curve at this point.
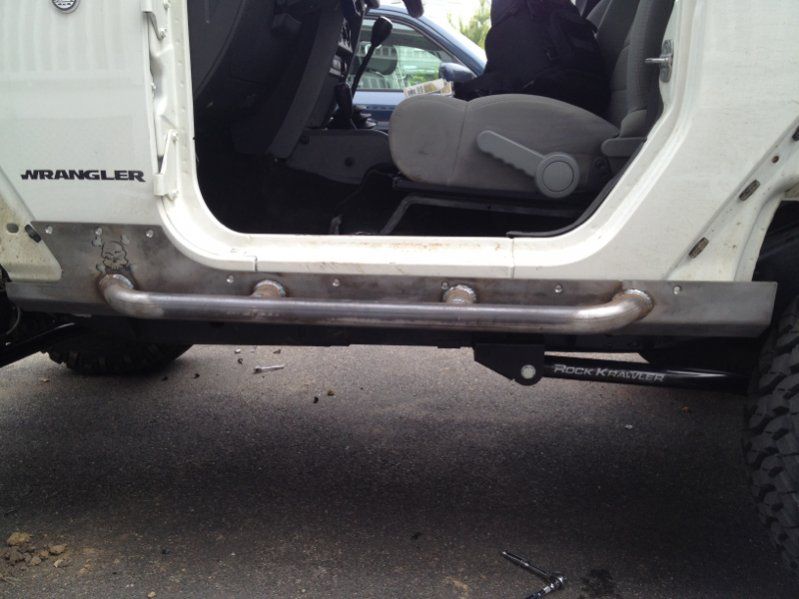
Then I test fit the new boat side sliders. Really sturdy, they bolt to the frame in two locations through the body mount, and have about 8 well nuts on each of them. After fitting, I marked and center punched all the holes for the well nuts.
After fitting the sliders, it was time to fit the corners on. I used a number of C clamps, and of course the handy Irwin Quick Grips. Love 'em.
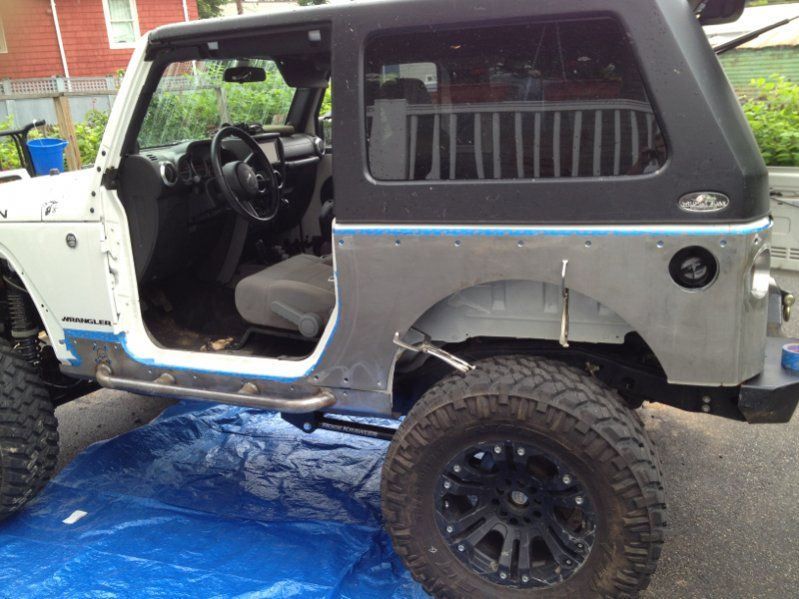
With the corners fitted I marked and center punched for well nuts.
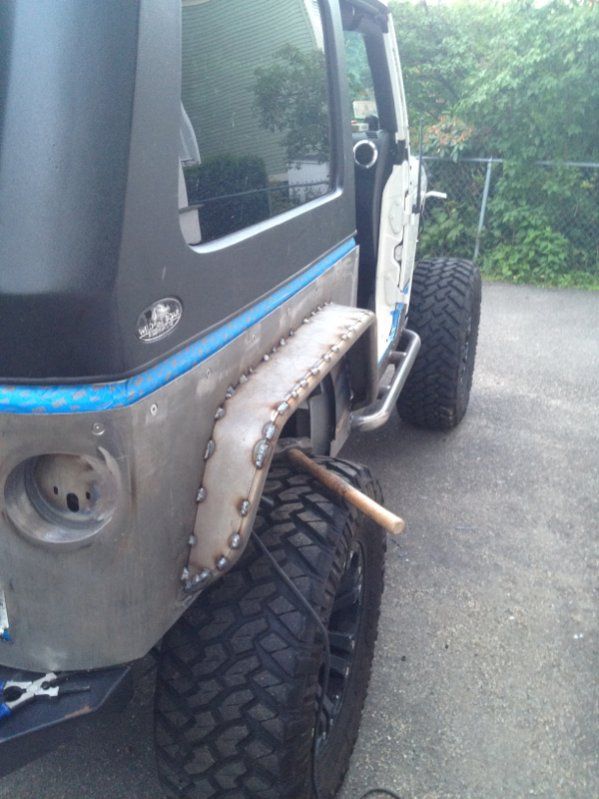
After securing the corners to the body with the well nuts I had to weld on the fender flares. The corners come with a "builder's kit" including 2 pre-bent tubes, 2 sheet metal skins to make the flares with, and 2 support brackets for each side. They ship as a pretty wide flare, I decided to make them a good bit narrower and went with 3.5" from the corner to the center of the tube at its widest point. I did the driver's side first to make sure the flare location would clear the gas filler.
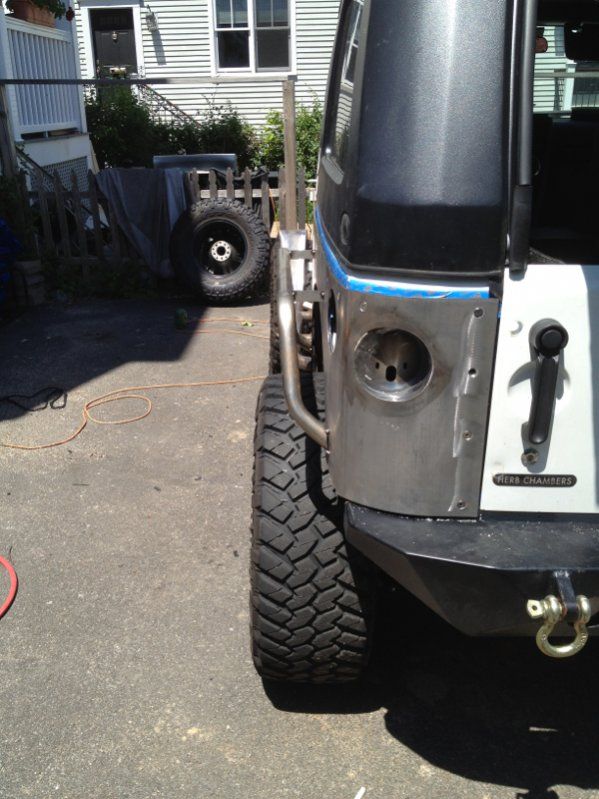
After welding the tube in place, I started working with the 16 gauge skin and trimming it down to fit.
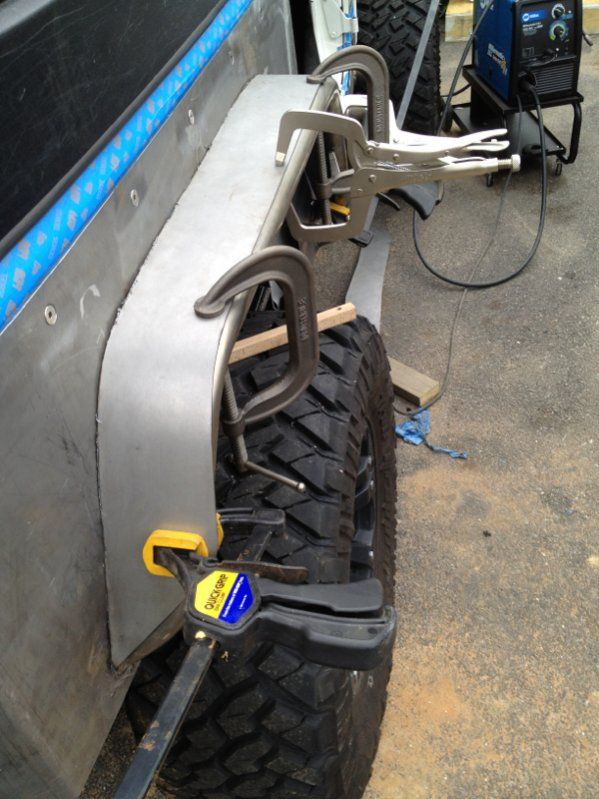
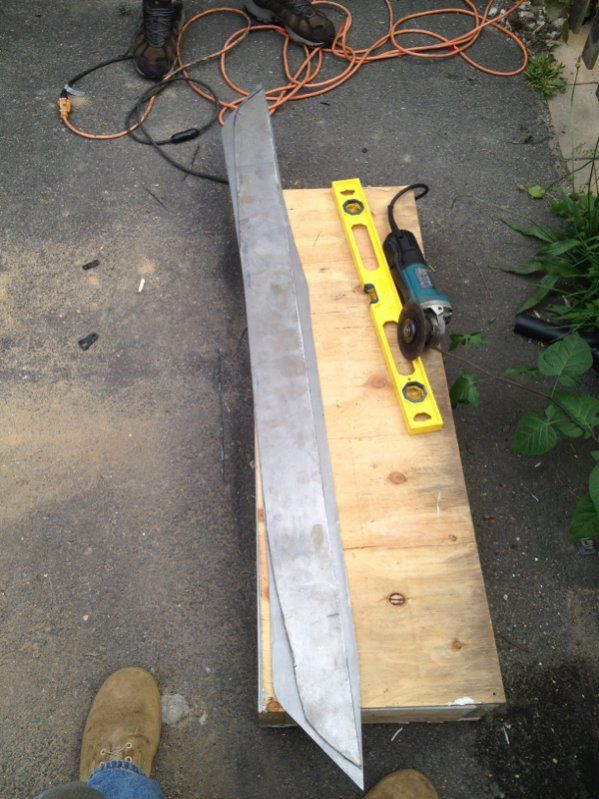
This one show about how much I took off...
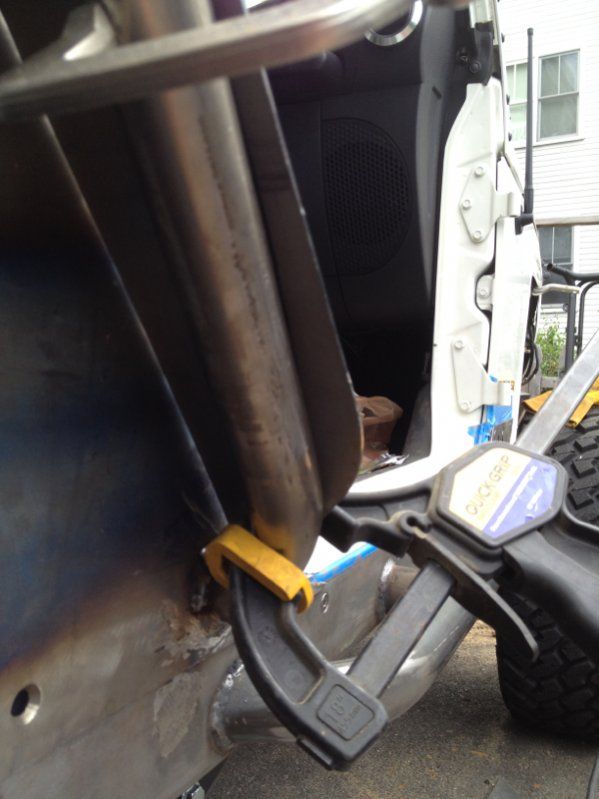
Then used the first one I did as a template for the second. If I had half a brain, or half as many beers at that point, I would have used CARDBOARD to mock up the fender skin first. Still worked out for me though.
Then tack welded the skins to the tubes.
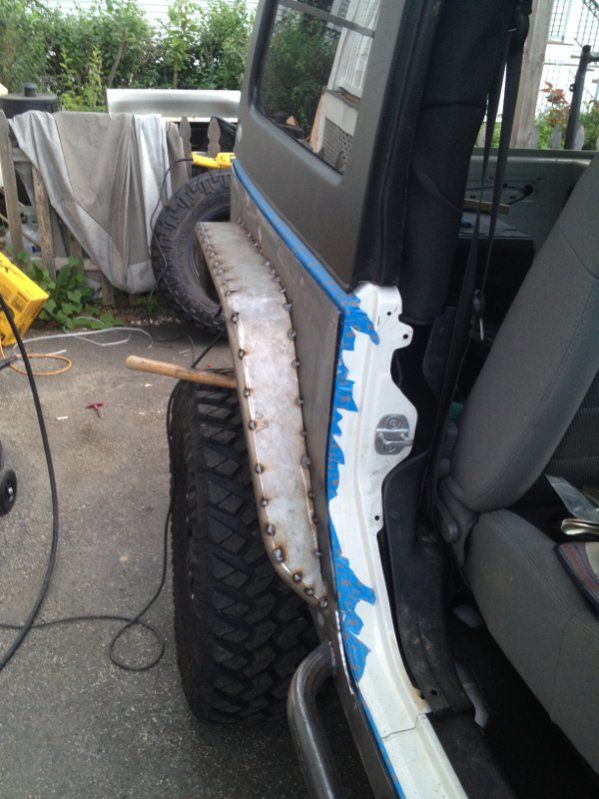
And brought them down to the basement and finish welded everything. I know. Ugly. I spent so much time grinding my welds I couldn't feel my hands for a day
Then I hit them with a few coats of primer after prepping them with a wire wheel to get any surface rust off.
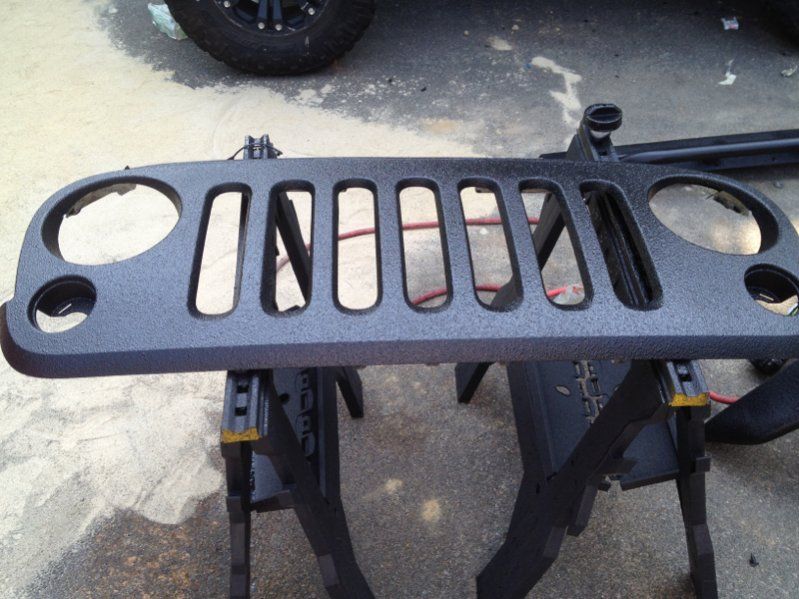
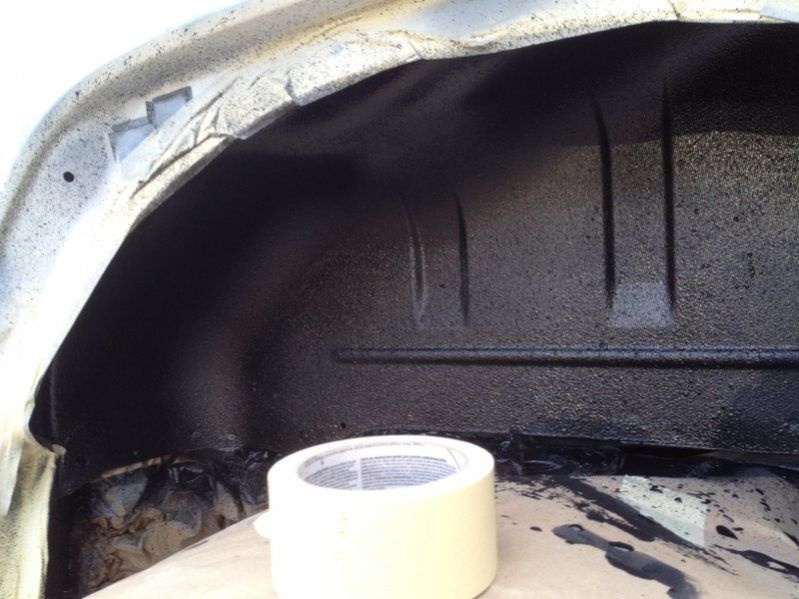
Went crazy with the bed liner. Sprayed my armor, rear inner fender wells, and then hit the grille with it too. This stuff is very scratch resistant and my grille was pretty beat up.
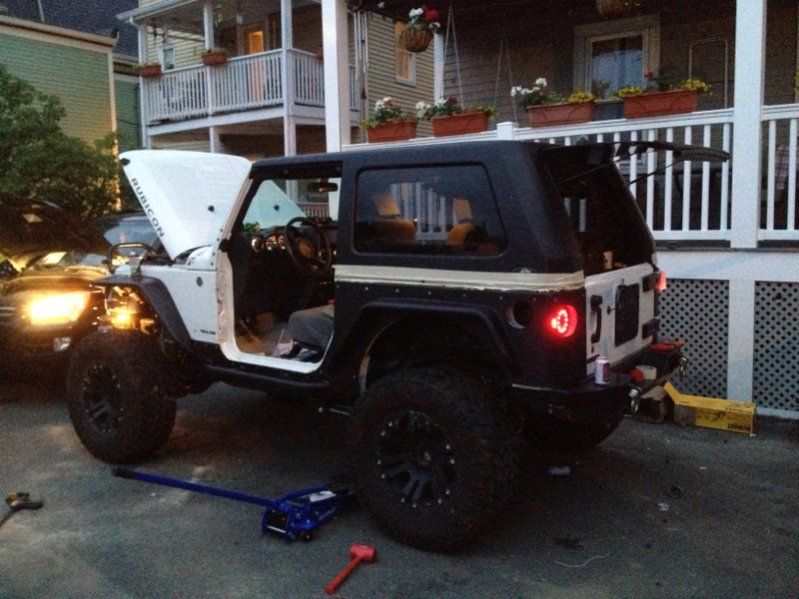
Finally bolted everything back on.
Not much to write up on the front fender install, just a simple bolt on job. Really nice thing about them is they have a number of bolts that go through the sub frame so they're extremely sturdy...I was showing a buddy how strong they were, climbed my 235 pound on top of one and dance a little jig...they never even budged.
River Raider Armor Install
- ASauer17
- BSJ BOD President
- Posts: 3151
- Joined: Fri Apr 08, 2011 12:32 pm
- Jeep Year: 1998
- Jeep Model: TJ Wrangler
- Real Name: Amanda
- Location: Hubbardston ma
Re: River Raider Armor Install
Nicely done! Digging the black n white combo!
I was thinking about doing the bed-liner on my grille aswell. Yours came out awesome
98/99 TJ
2025 President
----------------------------------------
2023 & 2024 President
2021 Director of Events
2018 Secretary
2016 & 2017 President
2014 & 2015 Secretary
2025 President
----------------------------------------
2023 & 2024 President
2021 Director of Events
2018 Secretary
2016 & 2017 President
2014 & 2015 Secretary
- ArticRubi
- BSJ 101 Planning Commitee
- Posts: 690
- Joined: Wed Sep 21, 2011 5:02 pm
- Jeep Year: 2008
- Jeep Model: JK Wrangler
Re: River Raider Armor Install
Thanks. I used Raptor Liner (link in the review I did.) Its easy to spray, and finished really nicely. Only downside to it is there is a 5-7 day wait for "full curing" I only waited 24 hours and on one or two of the nutserts it peeled away a bit...my fenders and sliders got about 4 days of curing and had no issues at all with any peeling there.asauer17 wrote:Nicely done! Digging the black n white combo!
I was thinking about doing the bed-liner on my grille aswell. Yours came out awesome
- ZAEDOCK
- BSJ Member
- Posts: 2428
- Joined: Fri Jan 01, 2010 11:18 am
- Jeep Year: 1992
- Jeep Model: YJ Wrangler
Re: River Raider Armor Install
Looks good. I realize the rear tail light is recessed, but it seems that cutting away the entire rear quarter defeats the purpose of protecting it. That said, (and knowing that the armor is now the quarter panel), shouldn't you just weld the armor the body for ultimate strength?
BSJ President 2003 - 2005Carl McFly wrote:X2, I agree with Joe. And not just because he's man candy
- ArticRubi
- BSJ 101 Planning Commitee
- Posts: 690
- Joined: Wed Sep 21, 2011 5:02 pm
- Jeep Year: 2008
- Jeep Model: JK Wrangler
Re: River Raider Armor Install
Good point about the weld on application. I did consider it but I'll be holding off for now: I need to have access to behind the tail lights in case I have any electrical issues there. My thought is if the armor takes a hard shot, it'll more than likely just pop a couple of well nuts. I'm sure it could go worse than that but I should be fairly well covered as long as its not a multiple rollover. That being said, when I do my one ton build I'll also be doing a comp cut and stretch. After the inner fenders are removed for that I'll have all the electrical access I need from the back side so I'll definitely be welding them on then.ZAEDOCK wrote:Looks good. I realize the rear tail light is recessed, but it seems that cutting away the entire rear quarter defeats the purpose of protecting it. That said, (and knowing that the armor is now the quarter panel), shouldn't you just weld the armor the body for ultimate strength?
I'm not sure I understand your point on the recessed tail light. The idea is to recess it to protect it from trees or other obstacles you might back in to. If you were worried about the strength of the corner, it still maintains the main subframe connection close to the tail gate so I don't see that really being a problem. Ideally, this would be a forged piece of steel that matched the contour of the body lines perfectly...unfortunately most of these aftermarket guys don't have a forge and make these parts on a press brake. Worked great on the TJ's and older with linear body curves not so much on my "JunK"
- ZAEDOCK
- BSJ Member
- Posts: 2428
- Joined: Fri Jan 01, 2010 11:18 am
- Jeep Year: 1992
- Jeep Model: YJ Wrangler
Re: River Raider Armor Install
Typically, on for example a TJ/YJ/CJ recessed light, you simply make a bigger and/or different hole, leaving the rest of the surrounding tub intact. My thought that because the rear factory cage hoop uses this area for support, it may be compromised a bit. The main subframe is intact, like you said, but seeing that large cutout raised a brow.ArticRubi wrote:I'm not sure I understand your point on the recessed tail light. The idea is to recess it to protect it from trees or other obstacles you might back in to. If you were worried about the strength of the corner, it still maintains the main subframe connection close to the tail gate so I don't see that really being a problem.
BSJ President 2003 - 2005Carl McFly wrote:X2, I agree with Joe. And not just because he's man candy
- DDewar53
- BSJ 101 Planning Commitee
- Posts: 927
- Joined: Fri Jan 01, 2010 3:41 pm
- Jeep Year: 1990
- Jeep Model: YJ Wrangler
Re: River Raider Armor Install
Nice work.
Did those front fenders come with the kit, or did you get them somewhere else?
Pacifism is a shifty doctrine under which a man accepts the benefits of the social group without being willing to pay - and claims a halo for his dishonesty.
Robert A. Heinlein
Robert A. Heinlein
- Carl McFly
- BSJ Member
- Posts: 2466
- Joined: Wed Dec 23, 2009 11:14 pm
- Jeep Year: 2000
- Jeep Model: TJ Wrangler
- Real Name: Carl
- Location: Medford MA
Re: River Raider Armor Install
jeez that beast is ALL bidness. Looks great!
"Roads? Where we're going, we don't need roads"
- ArticRubi
- BSJ 101 Planning Commitee
- Posts: 690
- Joined: Wed Sep 21, 2011 5:02 pm
- Jeep Year: 2008
- Jeep Model: JK Wrangler
Re: River Raider Armor Install
Ah, gotcha. Yeah I feel like with the subframe still intact the roll cage should be fine...as fine as a factory one can be anywayZAEDOCK wrote: Typically, on for example a TJ/YJ/CJ recessed light, you simply make a bigger and/or different hole, leaving the rest of the surrounding tub intact. My thought that because the rear factory cage hoop uses this area for support, it may be compromised a bit. The main subframe is intact, like you said, but seeing that large cutout raised a brow.
I'll be installing this DIY kit from Poly Performance sometime soon. It should really help to sure things up, and despite the fact its not designed as a frame tie-in cage they'll hold up to multiple roll overs. Didn't really want to do a bolt in sport cage despite the fact they should do their job at least once. I would love to do my own, but I'd be lying if I said I was proficient enough in cage design to trust it 100% even if it doesn't look that complicated...that and I don't have a tube bender.
http://www.polyperformance.com/shop/Syn ... 19591.html
Are we talking front fender flares? They are also River Raider. The rear flares are the "builder's kit" River Raider offers to install with their full corners. Since the corners cover up the factory flare mounting locations you need use the weld on variety.DDewar53 wrote:Nice work.
Did those front fenders come with the kit, or did you get them somewhere else?
Thanks! Not finished yet, cage going in soon, also got a set of Maxxis Trepador comp tires to go on some bead locks I'll be trailering to the tougher trails. Hopefully a one ton build will be happening this winter also if I can find the axles I'm looking for. Sneak peek at the TrepsCarl McFly wrote:jeez that beast is ALL bidness. Looks great!